By Kevin Williamson
Uploading images for web
- Do they need to be 72dpi?
There is a widely held belief that images destined for display on a website should be converted to 72dpi before uploading to the server. By the same token, it is also understood by many that images of 300dpi are far too large for the web and take too long to download, particularly on mobile devices. In some circles it is now thought that, with the arrival of retina displays, the uploading of images at 144dpi is acceptable.
All this sounds logical, doesn't it? But with a short practical test we can soon see that these claims don't stack up.
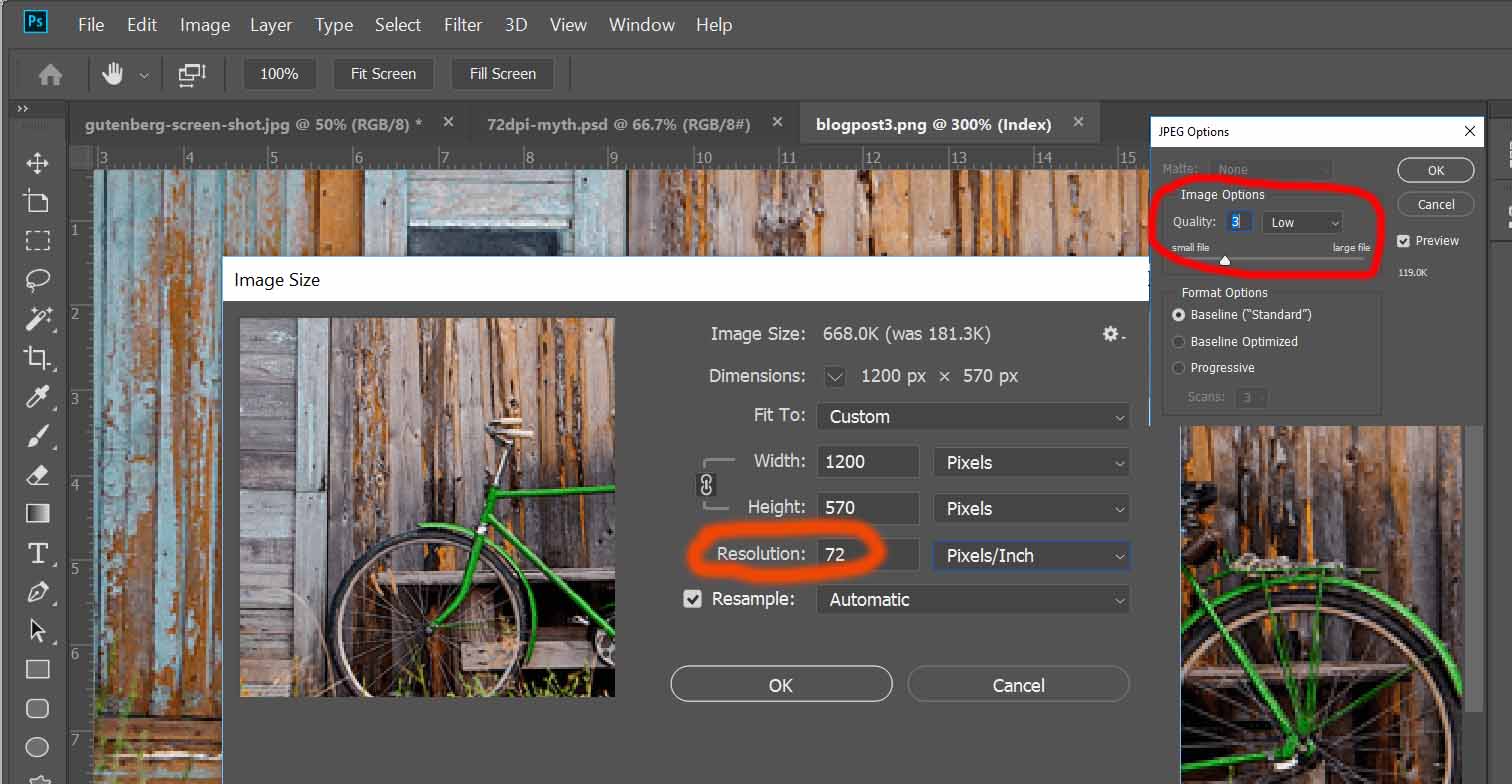
- Open an image and save it twice with both the same width and height, save the first at 72dpi and the other at 300dpi
- Inspect the two saved images and check out their file sizes; they're both the same size! How did that happen?
- Place the images in your favourite photo editor and stretch them until they begin to break up and pixelate. Both images pixelated at the same level of magnification right?
Both saved images are identical, nothing changed when I altered the dpi.
So, what's going on? Well, altering the dpi value of an image does absolutely nothing to change an image's size or resolution, its all a myth.
Images do need to be optimised for the web, but not by changing the dpi.
An image's width, height and the level of compression determines its filesize, not dpi.
Resize your image to fit the space allocated on your page.
Frequently oversized images are causes of download bottlenecks. Don't rely on CSS or your content management system(CMS) to resize your image. If the image is going to display in a column that is about 300px wide then that is the size your image width needs to be. Responsive websites will stretch and shrink your images according to the pixel width of your device so make sure your image is big enough to be viewed at full stretch on a desktop computer.
Having said that, add media queries in your page's CSS so that different sizes of images are viewed dependent on the width of the device your user is using. Show smaller image files on mobile devices and the largest in desktop computers. This gives faster download times for mobile devices and keeps Google happy.
Use image editing software to alter the compression of the image
When you save an image, experiment with the compression options. In Photoshop, for example, there is a sliding scale that gives varying quality options. Try saving at 80% compression to begin with and then gradually increase the compression until the image breaks up. As you increase compression the file size decreases. But beware, don't overwrite the original image, particularly jpegs. They have 'lossy' compression so if you compress the an image some of the original data is lost and you will not be able to increase their resolution without reverting back to the original image.
Need more advice? Just get in touch for a free assessment of the images on your website; are they optimised and do they give the best download speeds?